"On Air" Light
Last week I built an "On Air" warning light for the office. I have always wanted to put this kind of light outside a room where I could do some music recording. Then my wife became a remote worker for a large tech company and I found a new use for the warning light... to warn me (and others) when she is on the phone. As a remote worker she collaborates with her coworkers via phone, video, and VOIP chats all day long. Every now and then I go into the office and try to talk to her just as she is getting on a call, or find some other way to bother her while she is working. This however, is a thing of the past, and it only cost 25 minutes of my time (and a bit of hard earned cash.) Here is how I did it.


Materials:
LED Puck Light - Battery Powered, RF Remote Operated ($23.99 + Free Prime Shipping)
On Air Light - "On-Air" Red ($127.69 + $7.99 Shipping)
Various Screwdrivers
Step 1
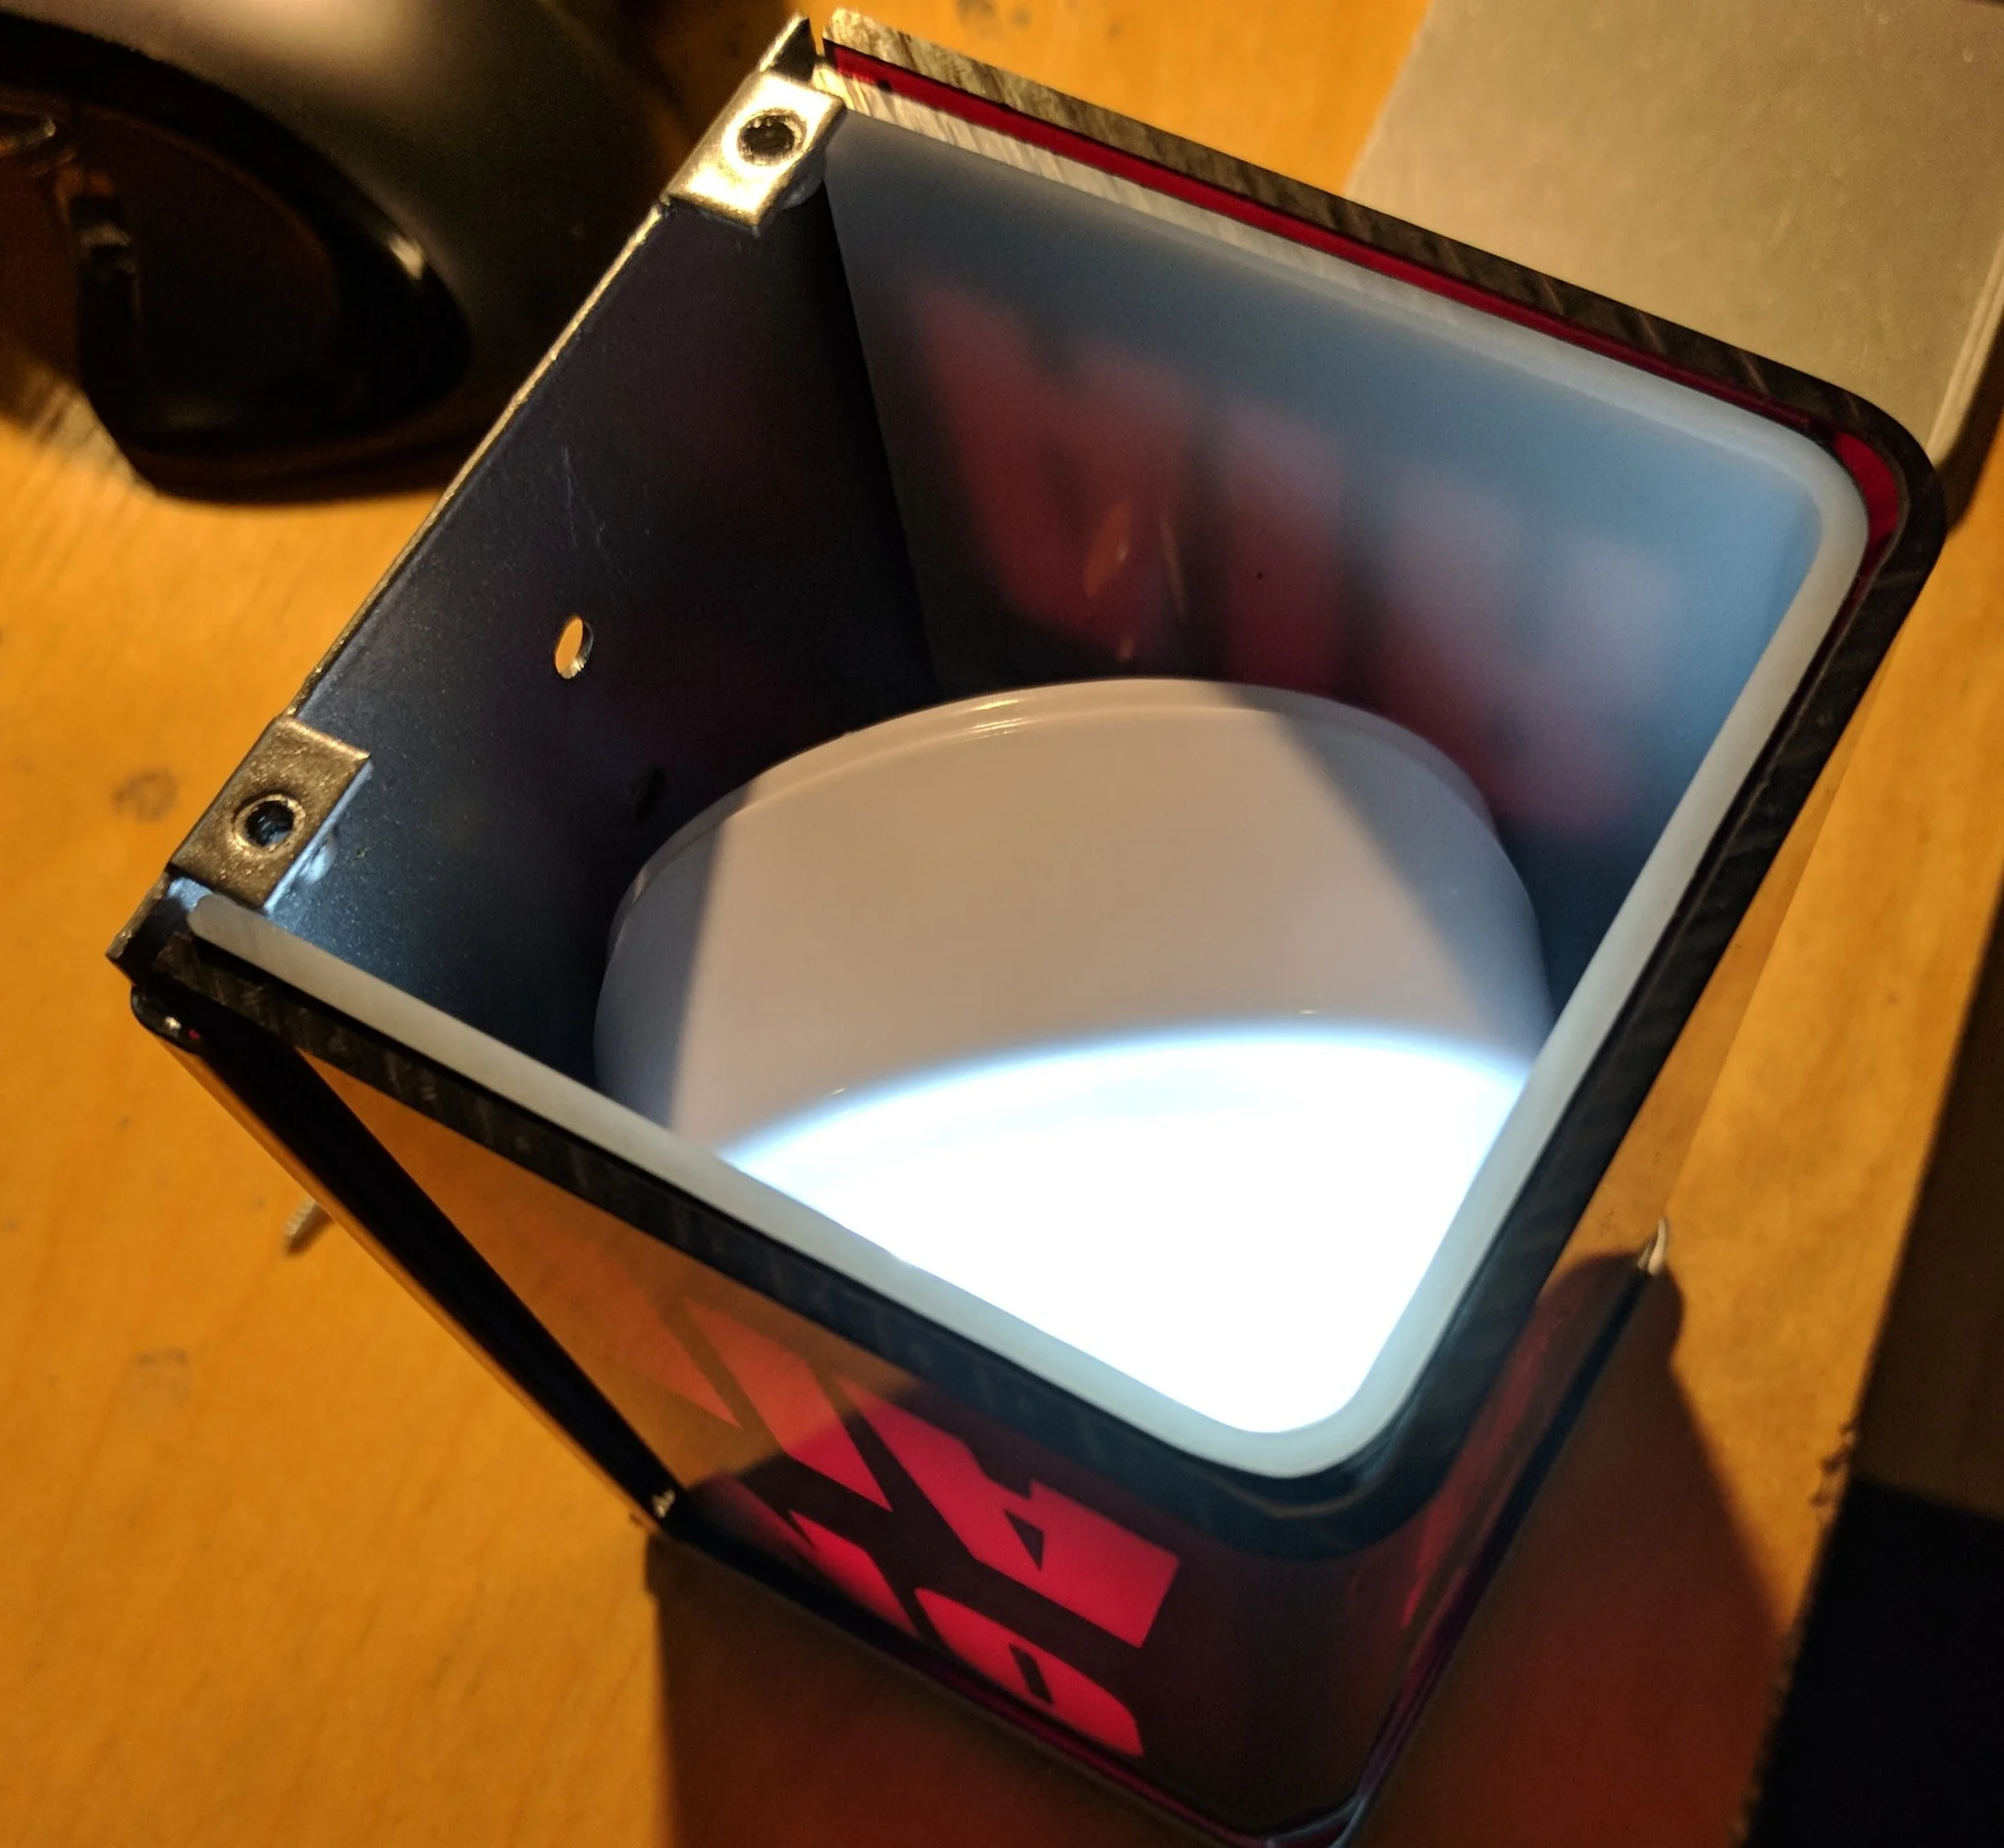
My first step was to put the puck light into the on-air light and just see how it looked. There would be no point in continuing if it looked bad or too dim. The puck I purchased was also too big for me to use it as-is inside the on-air light. This step let me determine how much room I had to play with and how much material I had to hack off the puck to make it fit.
[Note: You may also have to remove any existing LEDs from inside the on-air light. The light I had did not have any lights inside but usually on-air lights will come with some kind of lights pre-installed. You will not need those since this build uses a battery operated puck light.]


Step 2
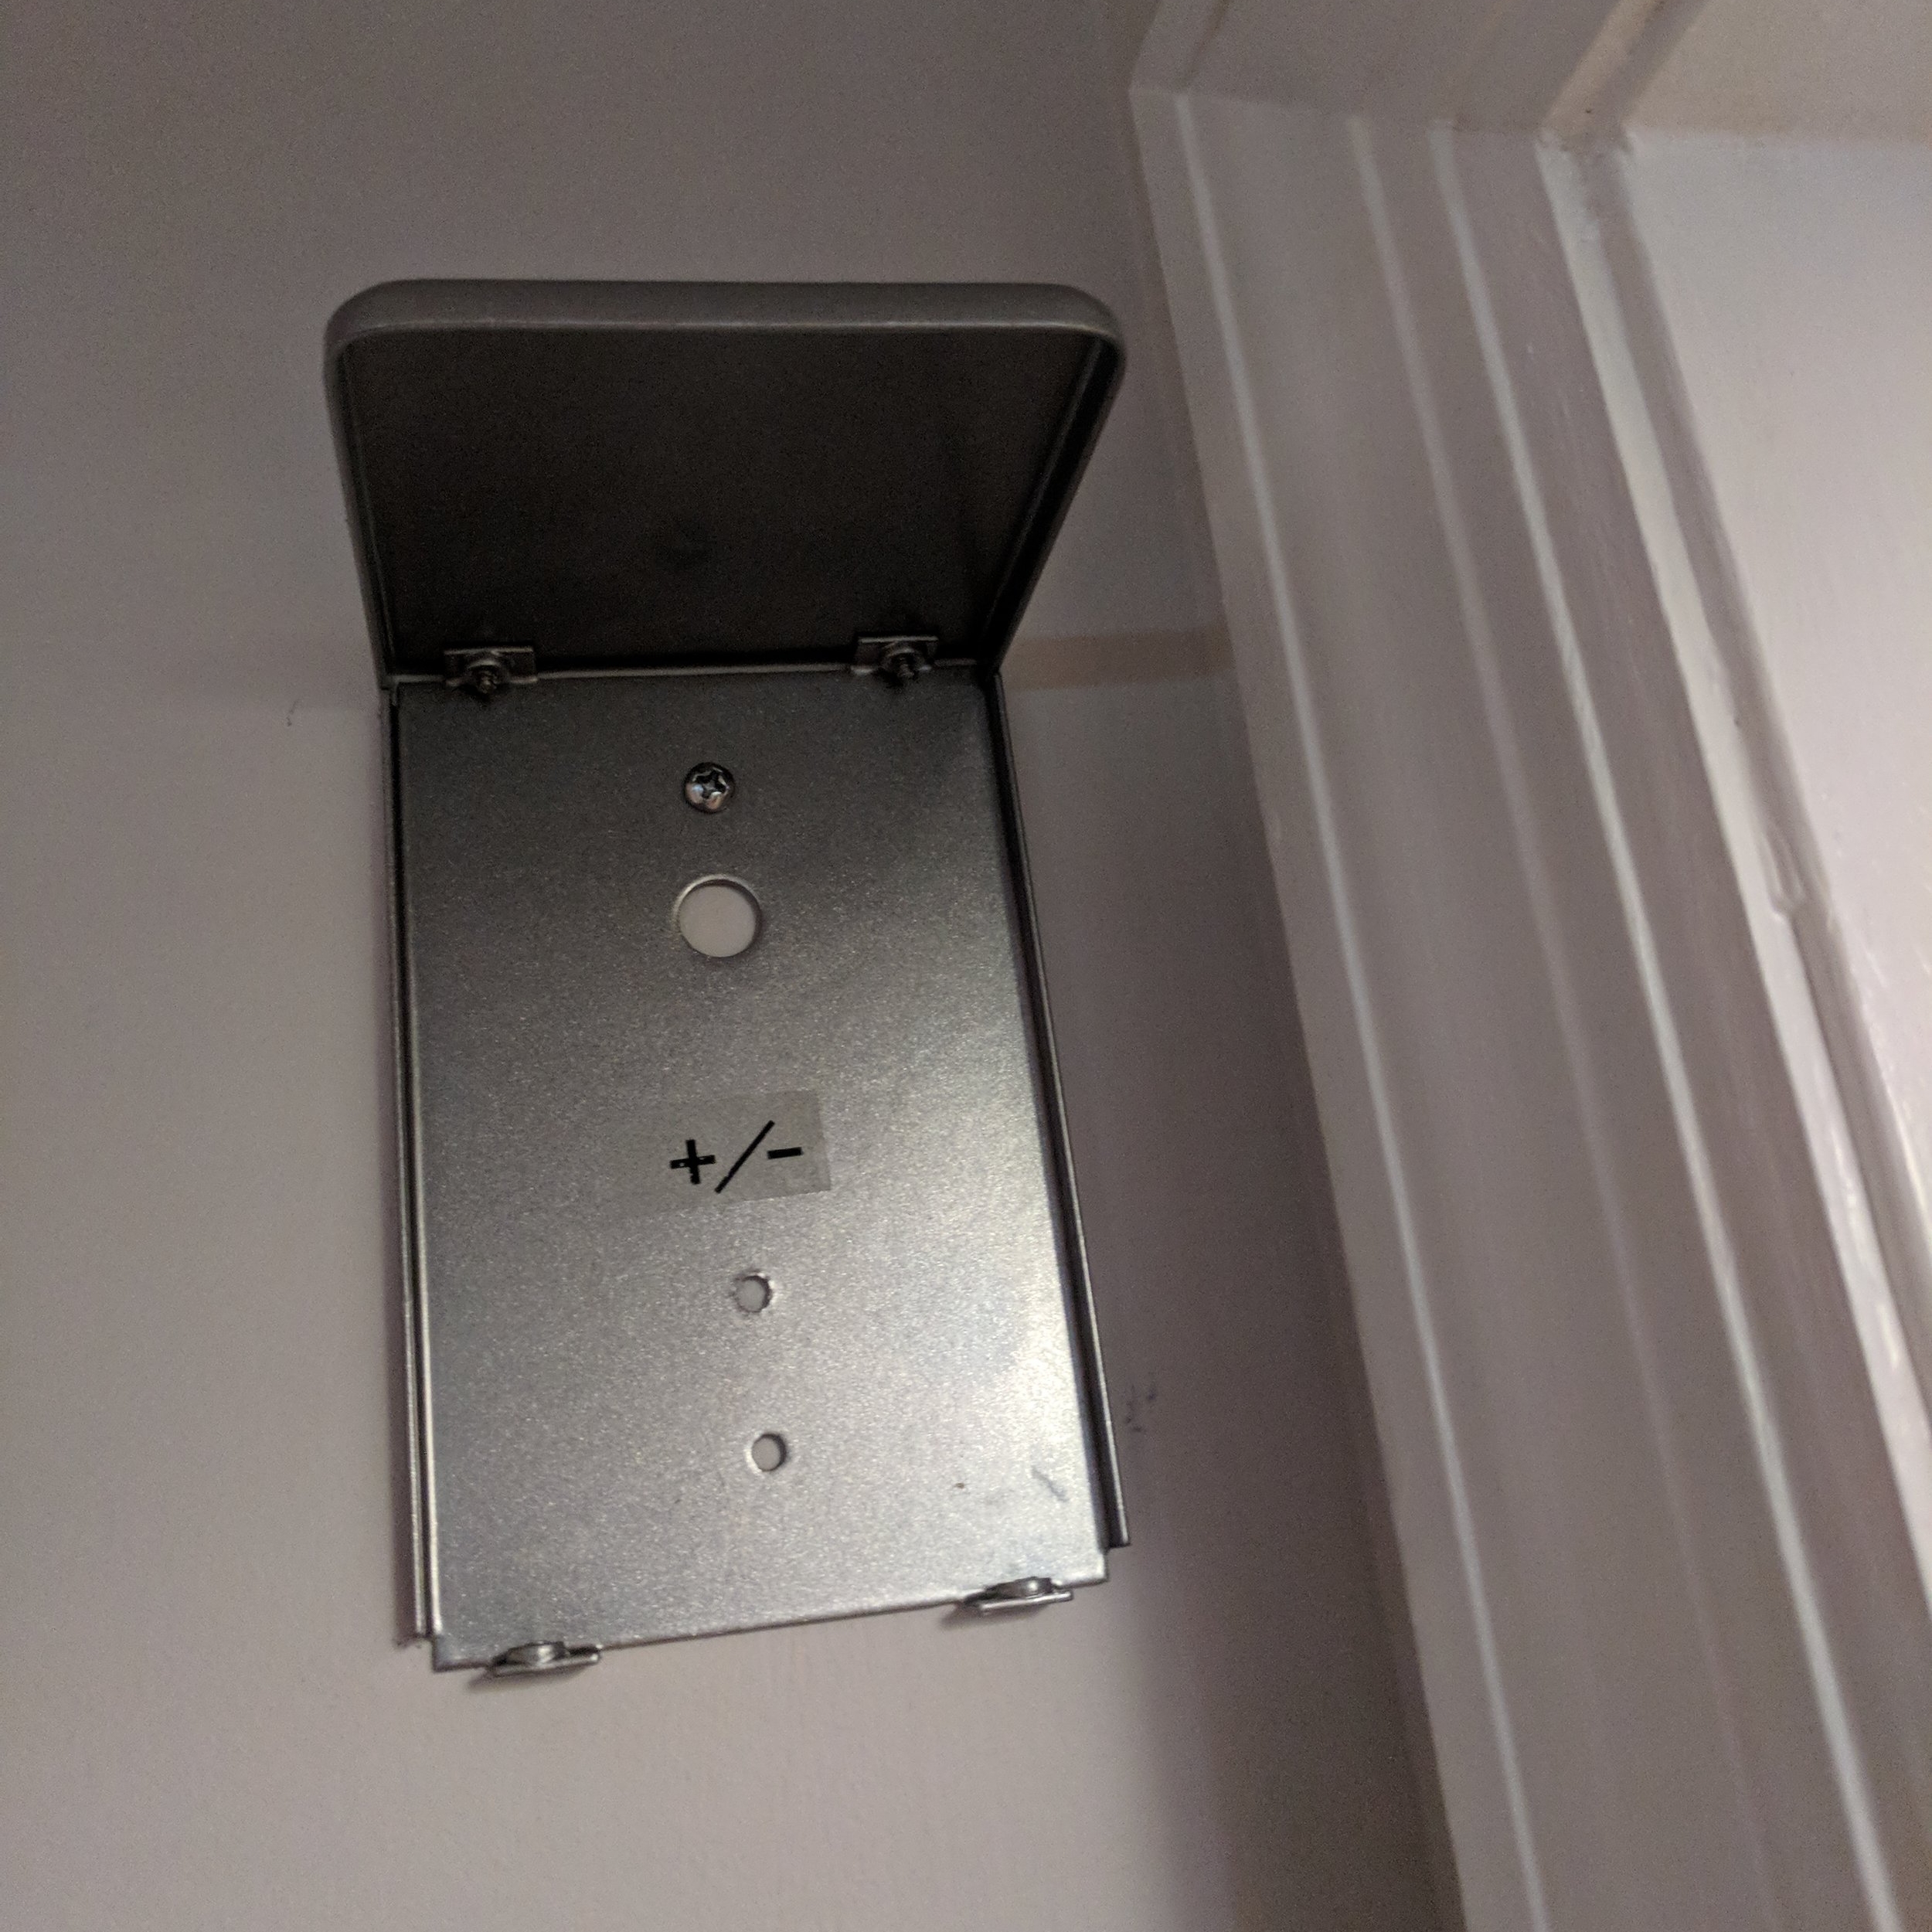
I disassembled the puck and removed the circuit board.


Step 3
Here is where this gets a little dirty. I could have unsoldered the circuit board and added a new battery pack but I didn't want to spend a lot of time on this project. I had to get the circuit board and the existing battery holder into the on-air light but I needed to remove a lot of the extra plastic. I grabbed a pair of angle cutters and clipped the plastic along the side of the battery compartment. I clipped at the bottom (like shown in the picture below) and then again at the top. Then I just bent the plastic back and forth until it broke. This is really dangerous so wear eye protection and make sure no one else is nearby since plastic shards can go flying.


Step 4
Now that (what's left of) the puck fits inside the on-air light I needed to make sure everything stayed in place. The back of the circuit board has no conductive parts (if you are going to try this at home, make sure yours does not either) and I was able to stick a piece of 3M double sided tape to hold the circuit board to the back of the battery compartment.


Step 5
I put batteries in the puck and put it inside the on-air light. There was an added bonus that I had not planned on when I started this project. The puck has magnets on the back of it and the on-air light has a metal back. The puck simply sticks inside the on-air light all by itself.


Step 6
I attached the light to the wall, stuck the puck to the back plate, and I closed the closed the light.
Done!


Afterthoughts
When I was working on the light and mounting it on the wall I removed the bottom of the on-air light enclosure. Next time I would remove the top instead so that I do not have to work as hard to hold the plexiglass signage and screw the bottom cover on at the same time.
I am also testing how long the batteries last in the light.
EDIT 8/11/20:
I was not happy with the battery life of the puck light in this project and I finally got around to fixing that. While I was updating the design I decided to make a new custom designed version of an on air light. I call it the On Air Cloud. Both are currently available for sale here. I’ll be making them to order for the next few months.